Cleaning ADAS Sensors the Right Way
A microfiber cloth and two minutes can fix more driver-assist complaints than most drivers realize.

Key takeaways
- Most ADAS sensor faults are caused by dirt, not damage, and clean up in minutes.
- Use only soft microfiber and gentle cleaner; never scrape or use abrasives on lenses.
- Clean both sides of the windshield for the forward camera, not just the outside.
- Avoid high-pressure washers aimed directly at radar and camera locations.
Before you spend money on a diagnostic scan or worry that an expensive sensor has died, try the thing that fixes the most driver-assist complaints I ever saw: cleaning. A shocking number of ADAS warnings are nothing more than the car saying its eyes are dirty. Clear the grime and the warning vanishes.
The catch is that these sensors are not like a bug-splattered headlight you can attack with a scrub brush. Cameras and radar have delicate surfaces and precise aiming, and cleaning them the wrong way can do real harm. Over the years I watched people scratch camera lenses, blast sensors loose with pressure washers, and smear the exact spot they were trying to clean.
So here is how to clean your ADAS sensors properly, safely, and in the right order.
What you need before you start
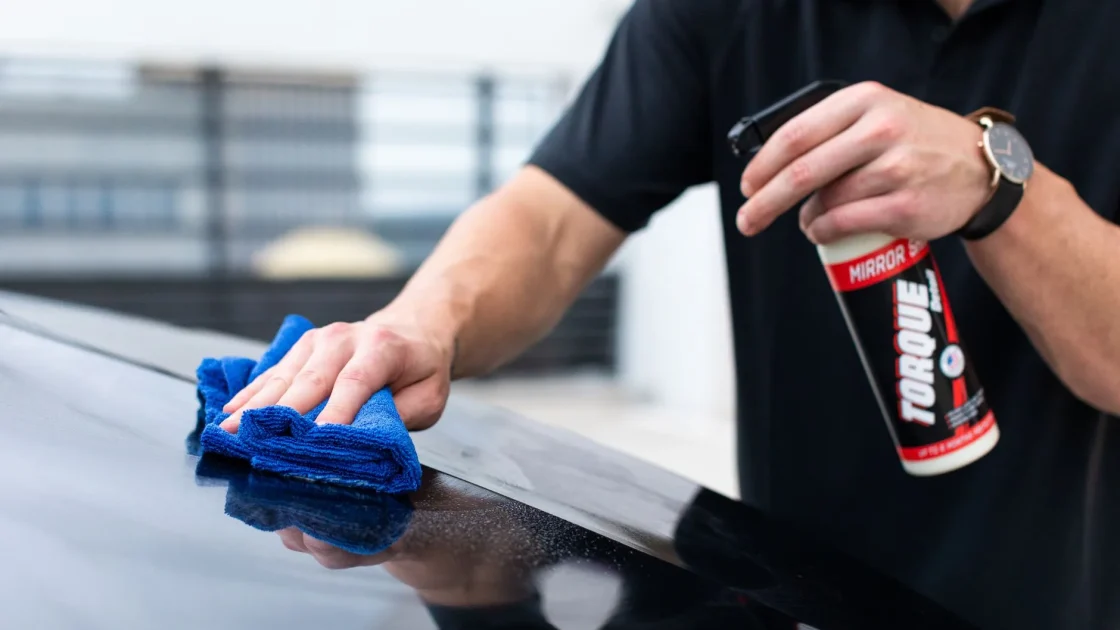
You do not need special products. You need gentle ones. Gather a couple of clean microfiber cloths, a mild automotive glass cleaner or plain water, and good lighting so you can actually see the sensor surfaces.
Avoid anything abrasive: no paper towels, no scrubbing pads, no household cleaners with grit or strong solvents. The lenses and covers on these sensors scratch far more easily than you would expect, and a scratch in the wrong place permanently degrades the view. If you first want to understand which surfaces you are dealing with, our overview of the cameras and radar behind ADAS maps out where each sensor lives.
Tip
Keep a dedicated microfiber cloth in the glovebox just for sensor and camera surfaces. Using a clean, grit-free cloth is the single best way to avoid scratching a lens.
Cleaning the forward camera
The forward camera behind your rearview mirror is the most important surface to get right, and the most commonly cleaned wrong. People wipe the outside of the windshield and forget that the camera also looks through the inside, where a hazy film quietly builds up.
-
Clean the outside glass
Wipe the windshield exterior in the area directly in front of the mirror housing with a damp microfiber cloth, then dry it with a clean one.
-
Clean the inside glass
From inside the cabin, gently wipe the same patch of glass in front of the camera. This is the step almost everyone skips, and it fixes the most complaints.
-
Do not touch the lens itself
Clean the glass, not the camera lens. If the lens looks dirty, a light wipe with a dry microfiber is the most you should do.
If your car keeps showing a camera message even after this, our guide on the clean front camera message walks through what to check next. The camera itself sits right where our article on the camera behind your rearview mirror describes, so a quick read there tells you exactly which patch of glass to focus on.
Cleaning radar sensors
Radar sensors hide behind the front grille, the bumper, and the rear bumper corners. You usually cannot see the sensor itself, so your job is to clean the painted surface in front of it. Wipe away mud, road film, snow, and bug residue from those areas with a damp cloth.
Because radar fires through the paint, you do not need to reach the sensor directly. Clearing the surface is enough. Our piece on the radar sensor behind the bumper explains why that painted panel is the real cleaning target. Resist the urge to apply thick wax or a heavy ceramic coating over the badge and bumper corners, because a heavy enough layer can dull the signal on its own.
Work methodically so you actually hit every radar location. Start at the front grille badge, then move to the lower front bumper where a second radar sometimes lives, and finish at both rear bumper corners. On many cars there are three or four separate radar spots, and it is easy to wipe the obvious front one while leaving a rear corner caked in road salt. Give each spot a light pass with the damp cloth, then a dry pass, and check that no film is left behind in low light. If a stubborn tar spot or dried bug will not lift with a damp cloth, soak it for a minute rather than scrubbing hard, since aggressive rubbing is what scratches the paint over a sensor.
Watch out
Do not aim a high-pressure washer directly at radar or camera housings from close range. The force can push water past seals or shift a sensor’s alignment. Keep the nozzle back and use a wider spray on those areas.
Cleaning parking and ultrasonic sensors
The small round buttons in your bumpers are ultrasonic parking sensors, and they clean easily. A damp microfiber wipe removes the mud, wax buildup, or insect residue that makes them beep for no reason. Do not dig at them with anything sharp, and do not let thick wax dry over their surface.
If yours are acting up, our guide to ultrasonic parking sensors explains how they work and why they get fussy when dirty. A common one I see: wax that dried white in the ring around each sensor, just enough to throw off the echo and set off phantom beeps in a quiet parking garage.
What cleaning cannot fix
Cleaning solves the dirt problems, which are the majority. It will not fix a cracked lens, a corroded connector, internal water damage, or a sensor knocked out of alignment by an impact. If a warning returns immediately after a careful cleaning, the cause is probably deeper.
In that case, resetting may not hold either, and our guide on when a reset will not work covers the next steps. For a broader sense of how to keep these systems healthy, the MyCarDoesWhat safety education site is a friendly, manufacturer-neutral resource.
A two-minute habit
Fold sensor cleaning into your normal routine. Every time you wash the car, give the forward camera glass, the grille badge, the bumper corners, and the parking sensors a deliberate wipe. In winter, clear snow and ice from those same spots before you drive.
It takes two minutes and it heads off the majority of driver-assist warnings before they ever appear. The most satisfying repair in this whole field is the one that costs nothing: a clean cloth, the right surfaces, and a warning light that simply goes away.
Frequently asked questions
Use a clean, soft microfiber cloth with plain water or a mild automotive glass cleaner. Avoid paper towels, abrasive pads, and harsh household chemicals, which can scratch lenses or damage sensor covers. Gentle is the rule for every ADAS surface.
Only with care. Keep the nozzle well back and use a wide spray rather than a concentrated jet aimed directly at radar or camera housings. Close-range high pressure can force water past seals or nudge a sensor out of alignment.
Because the forward camera also looks through the inside of the glass, where a hazy film builds up. Cleaning only the exterior leaves that inner haze in the camera's sightline. Wipe both sides of the windshield in front of the camera to clear it properly.
Every time you wash the car is a good rhythm, with extra attention in winter and after long highway drives that coat the front in bugs. A quick wipe of the camera glass, grille badge, bumper corners, and parking sensors prevents most dirt-related warnings.
Keep reading
Related guides
Thermal Cameras in Night Vision Systems
How the thermal camera behind automotive night vision sees warm bodies in the dark, and where its limits are.
Read guide
How ADAS Sensors Fail Over Time
Cameras and radar rarely die overnight; they degrade in specific, predictable ways you can learn to spot.
Read guide
How Car Radar Sensors Work
A clear, hands-on explanation of the radar units that power adaptive cruise, automatic braking, and blind spot alerts.
Read guide