How to Clear an ADAS Warning Light
The master reset order for any ADAS light: read it, clean it, cycle it, then reset before you ever pay a shop.

Key takeaways
- Clear the cause of an ADAS light in order, and the light clears itself, usually on a short drive.
- A dirty camera or radar is the single most common cause, so clean the exact sensor first.
- A battery-off reset reboots modules but never recalibrates a sensor, so use it only for leftover codes.
- A light that survives cleaning and a drive cycle, especially after glass or bumper work, needs calibration.
An ADAS warning light is your car saying it cannot trust one of its own senses right now. A lane symbol, a little car with waves, a radar dish icon, or a plain “Driver Assist Unavailable” message pops up, and the assist features quietly step back. It is rarely an emergency, and more often than you would think, it is something you can clear in your own driveway.
I spent years aiming cameras and radar for a living, and I clear these lights in a set order every single time. That order is the whole trick. Reach for the right step first and you fix it in ten minutes. Reach for the wrong one and you waste an afternoon, or worse, pay for a service the car never needed. This is the master guide, so I am going to lay out the full sequence and then point you to the specific fix for your exact light.
Quick definition before we start. ADAS means advanced driver-assistance systems: the forward camera behind your windshield, the radar behind your bumper, the corner and blind spot sensors, and the software that runs lane keeping, adaptive cruise, automatic braking, and blind spot alerts. When any of those cannot see clearly or reads something odd, the car throws a warning and disables the feature until it is happy again. Our job is to make it happy again, safely.
First understand what your light is telling you
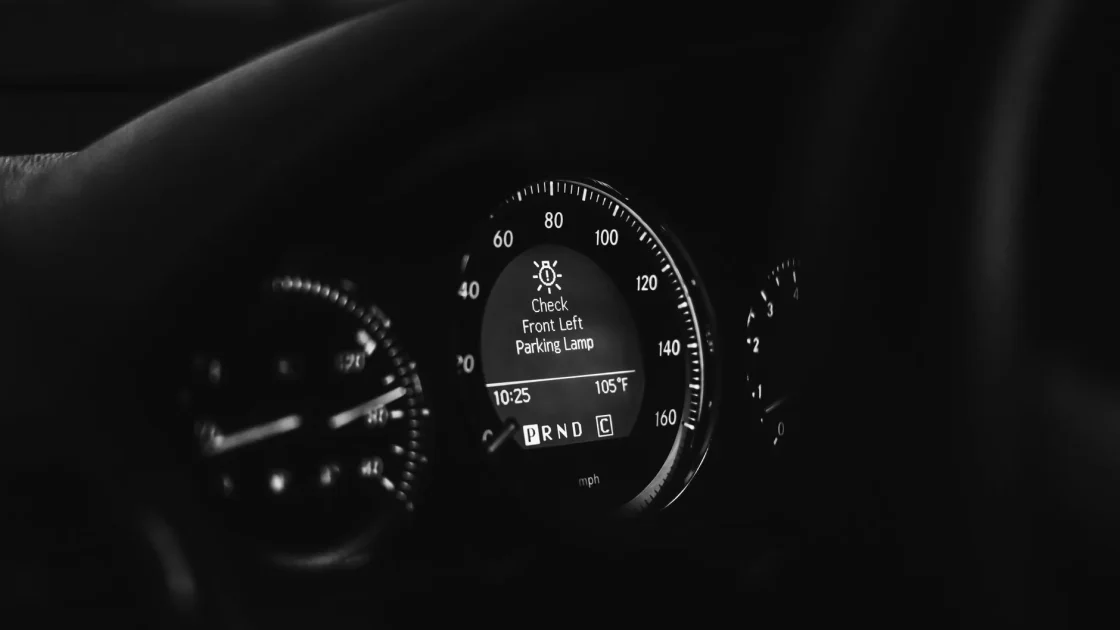
Before you touch anything, read the message. ADAS lights fall into three rough buckets, and knowing which one you have decides everything that follows.
The first bucket is a temporary “unavailable” message, the kind that shows in rain, fog, or heavy spray and clears itself once conditions improve. The second is a “clean sensor” or “blocked” message, which is the car telling you a specific camera or radar is dirty or covered. The third is a persistent fault that stays lit in clear weather with clean sensors, which usually points to calibration or a real hardware problem.
If you are not sure what your symbol even means, start with the plain-English rundown of what your ADAS warning lights actually mean. That reference sorts the icons by system so you can name yours before you start clearing it.
The core idea
You do not “reset” an ADAS light so much as remove the reason it turned on. Clear the cause and the light clears itself, usually within a short drive. Chase the light instead of the cause and it comes right back.
The order I clear every ADAS light in
Here is the exact sequence. Work top to bottom and stop the moment the light goes out. Most people never get past step three.
-
Rule out weather and a one-time glitch
If the light appeared in rain, snow, fog, or dense spray, or right after a jump start, it may clear on its own. Finish your drive, park, restart the car once, and see if it is gone. Temporary “unavailable” messages often are.
-
Clean the sensor the message names
A “clean front camera” or “front radar blocked” message is literal. Find the exact camera or radar it means and wipe the glass or the sensor face, on both sides where it is glass. This single step fixes the largest share of lights I ever saw.
-
Check for a physical obstruction
Look for a new sticker, a dash cam, a bug splatter, ice, a plate frame, a bike rack, or mud sitting in a sensor zone. Move or remove anything in the line of sight of a camera or radar and the fault often drops.
-
Drive a proper cycle so the car re-checks itself
After cleaning or clearing an obstruction, the car needs a structured drive to run its self-tests before it trusts the sensor again. Several minutes at a steady 40 to 55 mph on a marked road usually does it. This is the step people skip, then wonder why the light lingers.
-
Try a battery-off reset for a stubborn leftover code
If a code lingers after you fixed the real cause, disconnecting the negative battery terminal for 15 to 20 minutes can clear it. This reboots the modules. It never recalibrates anything, so only use it once the underlying problem is gone.
-
Scan, then consider calibration
If the light survives all of the above, read the stored code with a scan tool to learn exactly which system is complaining. A light that will not clear after cleaning, especially after a windshield or bumper job, almost always means a sensor is out of calibration and needs professional aiming.
Tip
Do the steps in order and stop at the first one that works. The most common mistake I see is jumping straight to a battery pull or a paid scan when the real fix was a thirty-second wipe of a dirty camera.
Match the fix to your specific light
The steps above clear most lights, but some symbols have their own quirks, and I have written a focused guide for each of the common ones. Find yours here and go straight to it.
If a lane symbol lit up or lane keeping went dead, the walkthrough on how to reset a lane departure warning light covers the camera-based checks and the reset that fixes it. If your dash reads that the front radar is blocked or dirty, the targeted steps in the fix for a front radar blocked message tell you where that radar hides and how to clear its face without damaging it.
Blind spot lights are their own animal because the sensors sit in the rear corners, so the piece on a blind spot monitor not working walks through those corner radars and the mud and ice that blind them. And if your adaptive cruise refuses to set or keeps dropping out, the checklist in adaptive cruise not working runs the causes in order, from a blocked front radar to a menu setting.
Two more that come up constantly: a “clean front camera” message has its own quick fix in the guide on how to clear a clean front camera warning, and if a light showed up right after the car wash, the reasons and remedies are in warning lights after a car wash.
The reset methods, ranked by how often they actually work
People love asking which reset “really” clears an ADAS light, as if there is one magic button. There is not, but the methods do have a clear pecking order in my experience.
| Method | What it does | When it works |
|---|---|---|
| Clean the sensor | Removes the actual obstruction | Most “clean” and “blocked” messages |
| Drive cycle | Lets the car finish self-tests | After a cleaning or repair, to confirm it |
| Battery-off reset | Reboots modules, clears leftover codes | Glitchy or lingering codes only |
| Scan tool clear | Erases stored codes electronically | Stubborn codes that self-clear will not drop |
| Calibration | Re-aims the sensor precisely | After windshield, bumper, alignment, or tire work |
Notice that calibration sits at the bottom not because it is rare, but because it is the one you cannot do at home. A drive cycle is free and often the missing piece, so the detailed guide on what a drive cycle is and how to do one is worth reading before you pay anyone. If you are wondering whether a battery pull alone will do it, the honest answer is in does disconnecting the battery reset ADAS.
Watch out
Never mute or ignore an ADAS light just to make it go away. The features it controls, automatic braking and lane keeping among them, are switched off while that light is on. Clear the cause so the systems work when you need them, rather than driving around with them disabled.
When clearing it yourself is not the answer
Some lights are honest signals that the car needs a tool or a technician, and knowing when to stop saves money and frustration. If the light followed a windshield replacement, a bumper repair, an alignment, or new tires, no home reset will fix it, because the sensor geometry changed and it needs recalibration. The overview in the complete ADAS calibration guide explains exactly what that involves and why a drive around the block will not substitute.
If you have cleaned, cycled, and reset and the light keeps returning, do not keep repeating the same steps. The next-move guide on when a reset will not work lays out how to escalate sensibly. And if you are debating whether you even need a scan tool for your situation, whether you need a scan tool to reset ADAS gives you the straight answer for common cases.
For the wider safety picture on why these systems earn their keep rather than being a nuisance to silence, the National Highway Traffic Safety Administration keeps a clear, jargon-light overview of what each feature does: NHTSA driver assistance technologies.
How to keep the light from coming back
Most repeat lights I saw came down to a few habits, or the lack of them. Keep the camera patch on your windshield clean on both sides, since interior haze is the sneakiest cause. Give the radar area of your bumper a wipe when you wash the car, and clear snow and ice from the grille and corners in winter before you drive.
Be careful what you stick near a sensor. Mount dash cams and transponders off to the side of the forward camera, not in its view. And after any bodywork, glass work, alignment, or tire change, assume calibration is part of the job and ask about it up front rather than discovering a light later.
Do that, and clear lights in the order above when they do appear, and you will handle the vast majority of ADAS warnings without ever leaving your driveway. Save the shop for the ones that genuinely need a target board and a trained eye, and you will know the difference because you followed the sequence and it told you.
Frequently asked questions
Work in order: rule out weather, clean the exact sensor the message names, remove any obstruction, then drive a steady cycle so the car re-checks itself. If a code lingers after the cause is fixed, a 15 to 20 minute battery disconnect can clear it. Stop at the first step that works, because most lights clear after a simple cleaning.
A light that returns means the underlying cause is still there, not that the reset failed. The sensor is usually still blocked, out of aim, or failing, so the car re-detects the fault the moment it powers up. If cleaning and a drive cycle do not hold it, especially after a windshield or bumper repair, the sensor most likely needs recalibration.
Sometimes, but only for a leftover or glitchy code, and only after you have fixed the real problem. Leaving the negative terminal off for 15 to 20 minutes reboots the modules and can drop a lingering code. It never re-aims a camera or radar, so it does nothing for a calibration fault.
The car is usually safe to drive mechanically, but the assist features tied to that light, such as automatic braking or lane keeping, are switched off while it shows. Drive as if you have none of those aids until you clear it. Finish your trip safely, then work through the fix so the systems come back.
Keep reading
Related guides
What a Drive Cycle Is and How to Do It
A plain-English guide to the drive that lets your car finish its self-checks and clear a light.
Read guide
Blind Spot Monitor Not Working: Fixes
Check the switch, clean both rear corners, rule out a hitch or trailer, then look at the sensors and a scan.
Read guide
Adaptive Cruise Not Working: What to Check
Check the conditions, clean the front radar, drive a cycle, then reach for a scan or calibration.
Read guide